Calib - sel/edit
This is the main calibration page most rowers will use. It lets you choose the active oar calibration and edit the geometry used to calculate Scale Factor.
Typical use
- Choose an existing saved calibration, scan a label, or start from the default setup.
- Confirm the rig type, side, sensor locations, inboard, outboard, and shaft profile.
- Use Get sensor locations from picture when you want the app to estimate the main oar measurement positions from a photo.
- Review the displayed Cperm, Keff, and SF deg² values.
- Use Save Changes when you want the edited values to become the active workout defaults.
What is saved
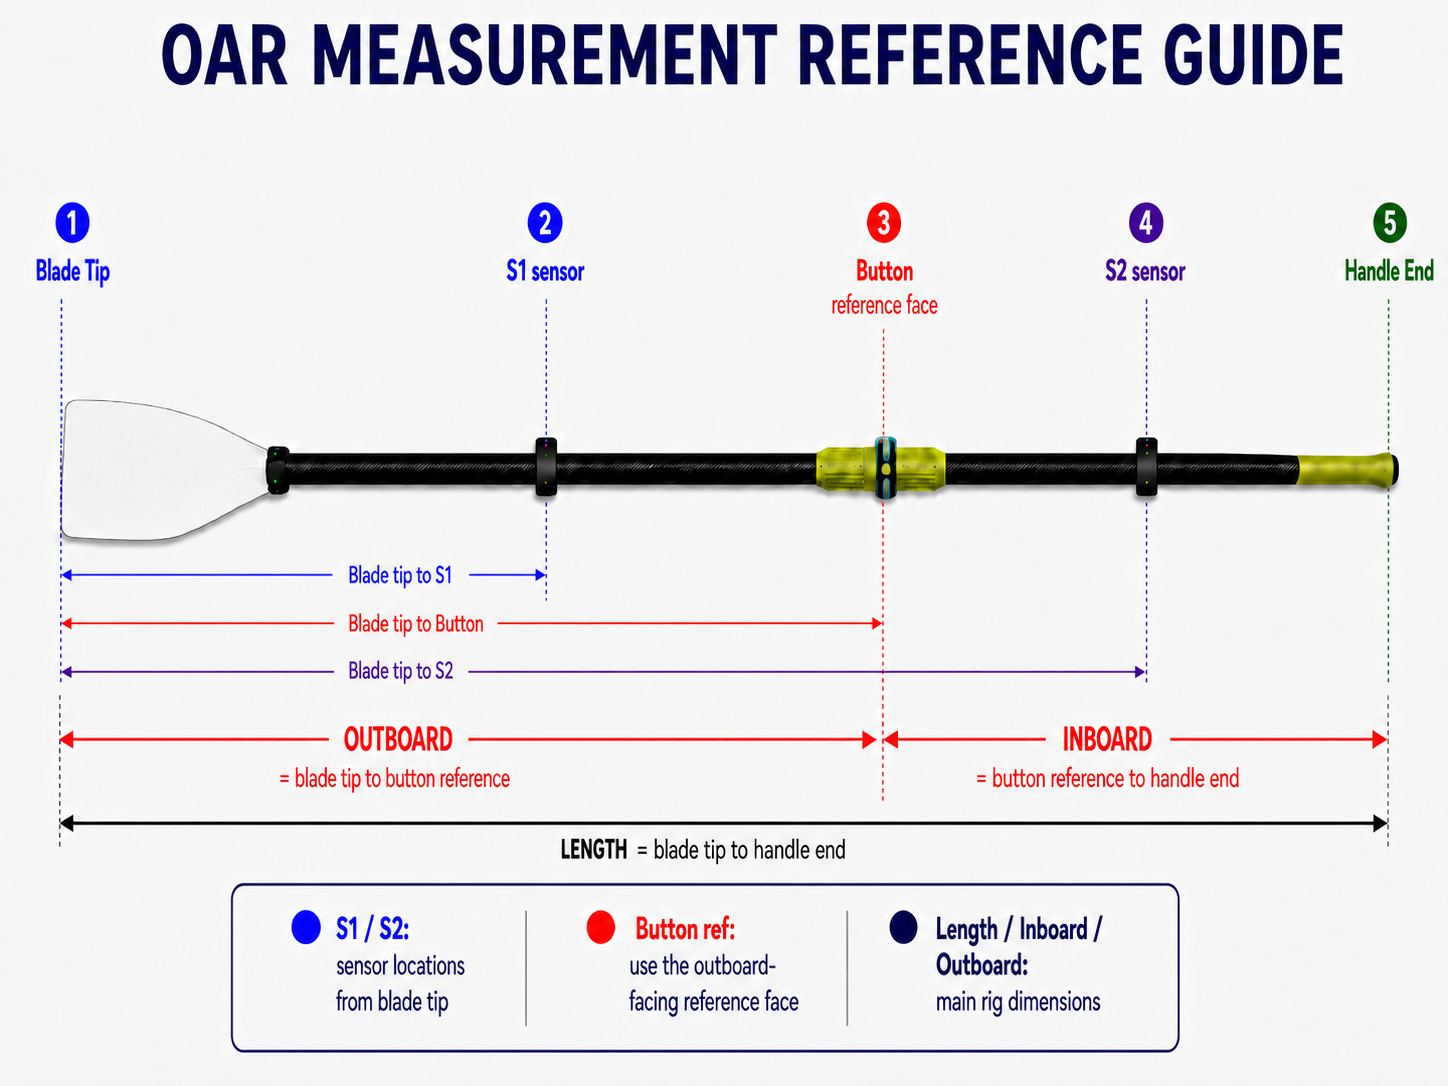
A saved calibration stores the name, rig type, side, S1/S2 sensor positions, inboard, outboard, total length, shaft-profile information, calibration value, and computed Scale Factor. This allows the app to calculate force, work, power, and power split with the correct magnitude for that oar setup.
If this page shows an override note, the displayed workout settings differ from the active calibration reference. Saving or selecting the calibration updates the active workout defaults.
Photo measurement reminder
The photo tool is a convenience for entering geometry. The important part is that all distances use the same reference: the blade tip for S1/S2 and the outboard-facing button reference face for the button/outboard reference.