
Sensor Setup & Calibration Guide
Introduction
The RitmoForceCurveâ„¢ Sensor System measures real-time oar force, motion, and stroke dynamics to deliver precise performance feedback for rowers. Designed for durability and accuracy, each Bluetooth-enabled sensor captures high-resolution force curves and stroke timing, syncing seamlessly with the RitmoForceCurve mobile app. This guide provides setup, calibration, and troubleshooting instructions to ensure optimal sensor alignment and reliable on-water data collection.
Download the TestFlight iOS Beta app
Included Components (per sensor)
|
· ritmoForceCurve Sensor |
|
||
|
· Silicone Band |
|
||
|
· Mounting Bracket |
|
||
|
· Rubber under pad |
|
||
|
· Velcro or Silicone Strap |
|
Assembly Instructions
1. Seal the sensor: The silicone wedding band seals the sensor from water at the USB-C port and seam. Invert it so the flat smooth side contacts the sensor. Wrap it around the sensor as shown below.
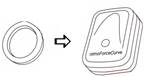 Figure 7
2. Mount the sensor: Insert the sensor (with band) into the plastic mount bracket. Ensure the button faces away from the curved underside. Verify the band has not shifted off the port or seam.
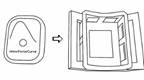 Figure 8
3. Pad the oar: Place the neoprene pad between the bracket and the oar shaft. It adds friction and protects the oar.
 Figure 9
  Figure 10
4. Secure with Velcro* or silicone* strap: Secure the bracket to the oar using the Velcro or silicone strap. Tighten firm enough to prevent slip from a forceful finish feather motion. The bracket curvature is sized to fit all oars with the extremes being standard sweeps and skinny shaft sculls.
|
|
|
|
*We are currently evaluating strap material options, including Velcro and silicone, and expect to finalize our selection by early 2026.
Sensor Orientation
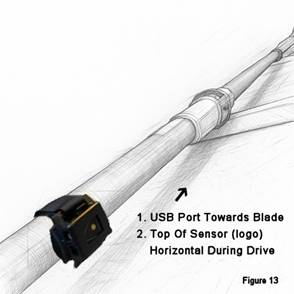 Figure 13
|
|
|
Connecting & Calibration
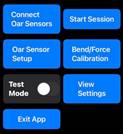 Figure 16
Connecting the Sensors:
 Figure 17
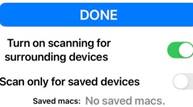 Figure 18
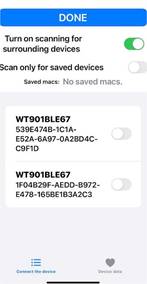 Figure 19
Oar Sensor Setup
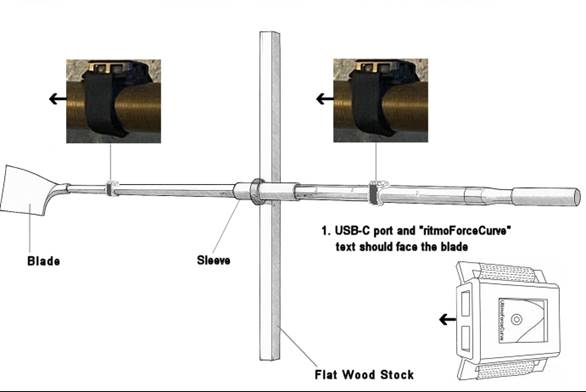 Figure 20
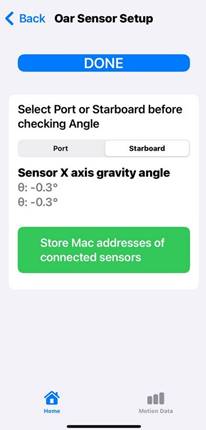 Figure 21
|
|
|
Bend Force Calibration
This setting scales Watts and powerSplit but doesn’t affect:
- Max bend
- Force curve shape
- Stroke length
- Catch or Finish miss values.
Bend varies with sensor distance and oar stiffness. For now, adjust the value until powerSplit looks correct. In future updates, we’ll provide notes on how to calibrate using HR and steady-state watts.
 Figure 22
Troubleshooting Table
|
Issue |
Possible Cause |
Solution |
|
Sensor not detected |
Bluetooth off |
Turn on sensor / enable Bluetooth |
|
Data spikes |
Loose bracket |
Check Velcro strap / reposition pad |
|
Bend reading inaccurate |
Misaligned sensor |
Adjust orientation / recalibrate |
 Figure 1
 Figure 2
 Figure 3
 Figure 4
 Figure 5
 Figure 6
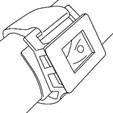
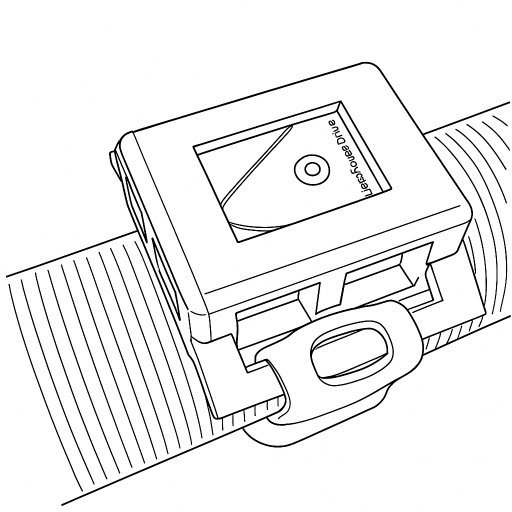 Figure 12
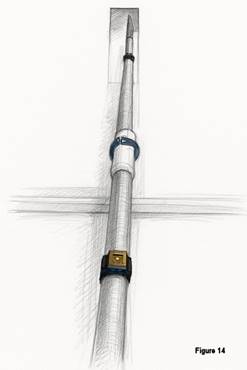 Figure 14
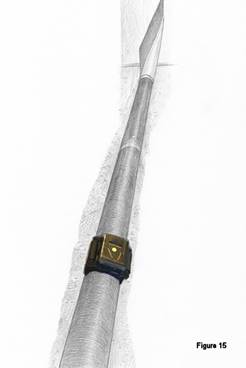 Figure 15